

Managed Deployment
Administrators of the Neon Cyber platform can deploy the Neon Extension silently through various methods. This article will walk you through the steps, based on your deployment strategy, to silently push out the Neon extension automatically. This is the recommended way to deploy Neon across your organization.
Microsoft Group Policy Steps
Chrome
- Ensure you have Microsoft Entra Domain Services or permissions to manage AD through Group Policy
- Install the Group Policy Chrome Admin template
- Download the Chrome bundle From Google
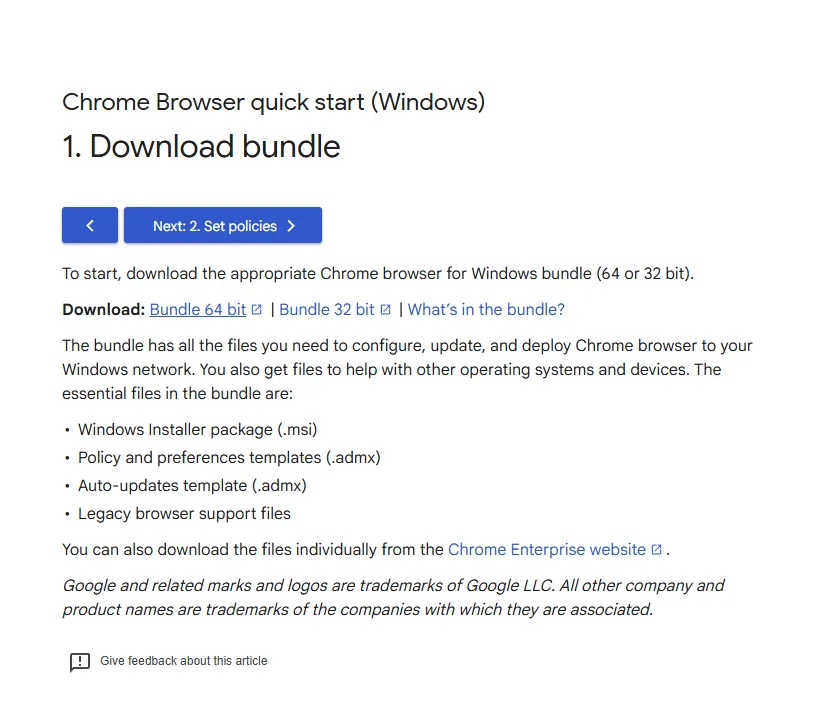
- Extract the downloaded zip file
- Open Group Policy Management Editor
- Under the correct Domain select “Computer Configuration” -> “Administrative Templates”
- Right click Administrative Templates and select “Add/Remove Templates”
- Click “Add”
- Navigate to your extracted bundle under <unzipped directory>/adm/language/chrome.adm

- Verify the template was added in GPM under Templates/Classic Administrative Templates/Google/Google Chrome
- View your Neon Cyber Configuration
- In the Neon Platform click “Deployments” -> “Add Users” -> “Managed”
- Click “Group Policy”
- Select “Chrome” and “Windows”
- Find your “Deployment Token”
- Update Group Policy Configuration
- In Group Policy Management select “Computer Configuration” -> Templates -> “Google Chrome” -> “Extensions”
- If you would like to install for select users do the same under User “Configuration”
- Select “Configure the list of force-installed apps and extensions”

- Clicked the “Enabled” radio button and click “Show”
- Paste in “ojablpjhhnghnemkmpaghanndgoenjpd;https://clients2.google.com/service/update2/crx”
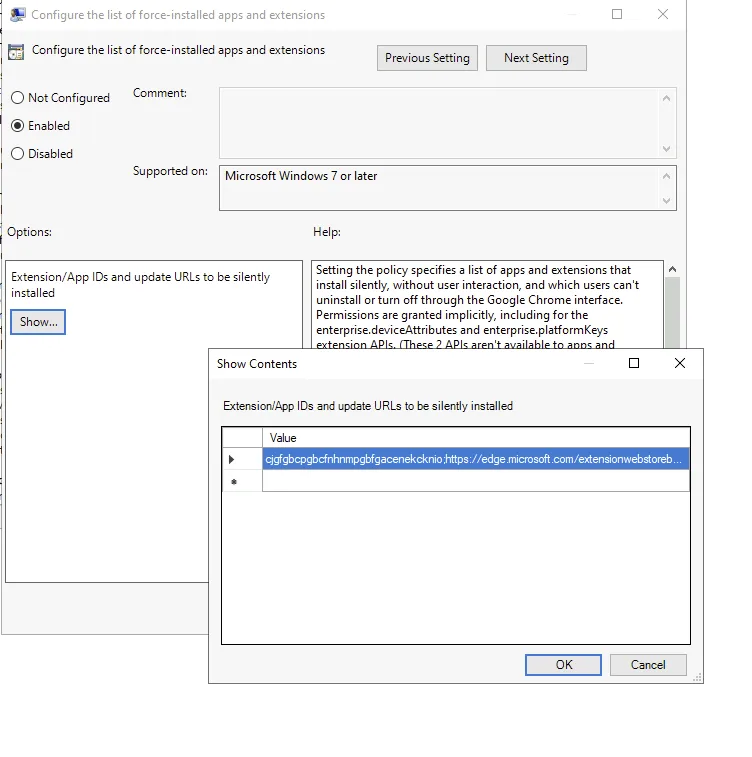
- Click “OK” on the current and previous screens
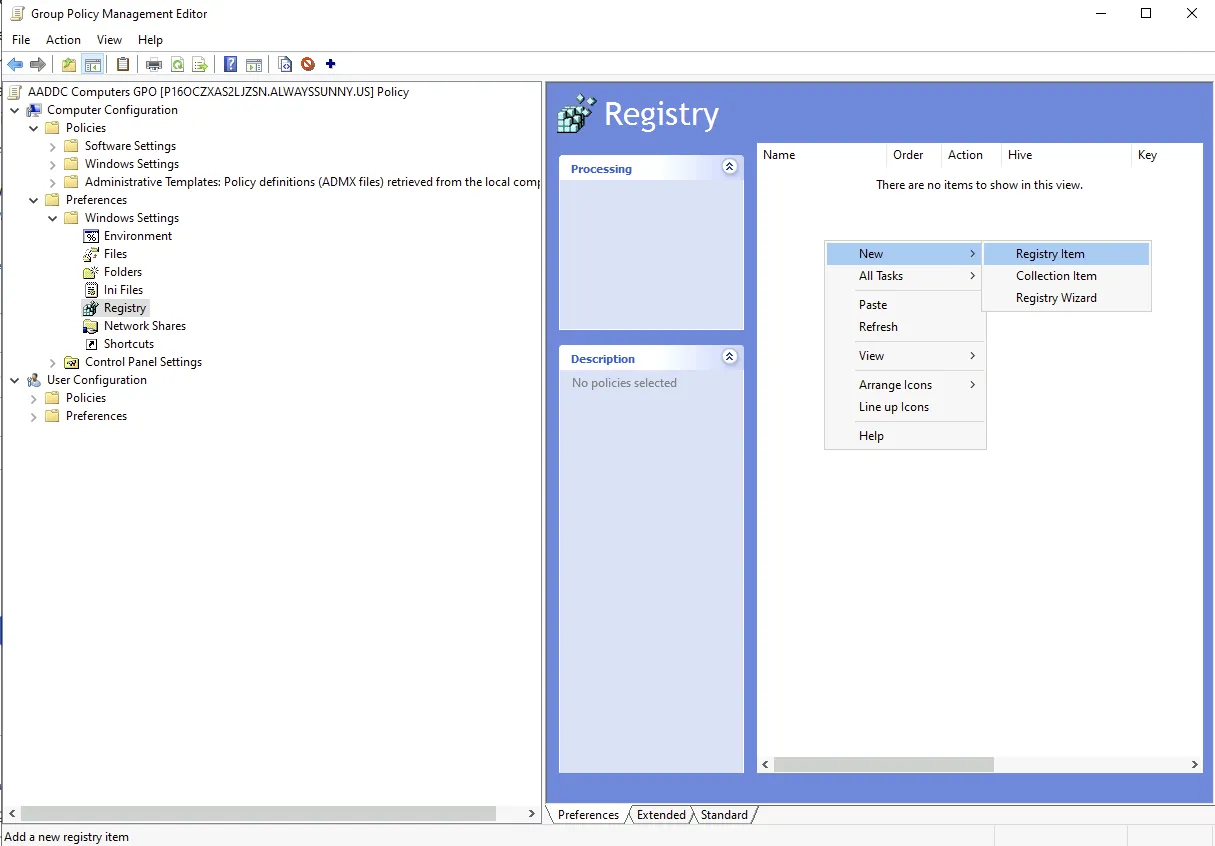
- Under “Computer Configuration” -> “Preferences” -> “Windows Settings” select “Registry”
- Add Neon to the force install list
- Right click in the “Registry” panel and select “New” -> “Registry Item”
- Add “SOFTWARE\Policies\Google\Chrome\3rdparty\Extensions\ojablpjhhnghnemkmpaghanndgoenjpd\policy” to “Key Path”
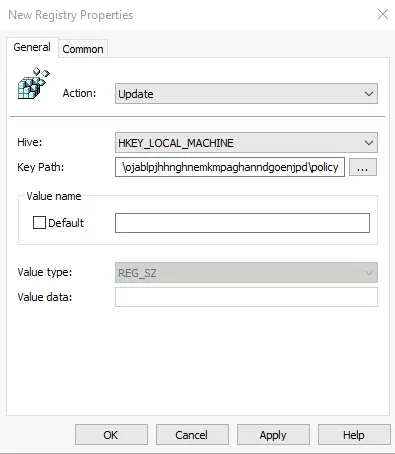
- Click “OK”
- Add Neon configuration to extension policy
- Right click in the “Registry” panel and select “New” -> “Registry Item”
- Add “SOFTWARE\Policies\Google\Chrome\3rdparty\Extensions\ojablpjhhnghnemkmpaghanndgoenjpd\policy” to “Key Path”
- Add “deploymentToken” to “Value name”
- Copy/paste the deployment token from the Neon Platform to “Value Data”
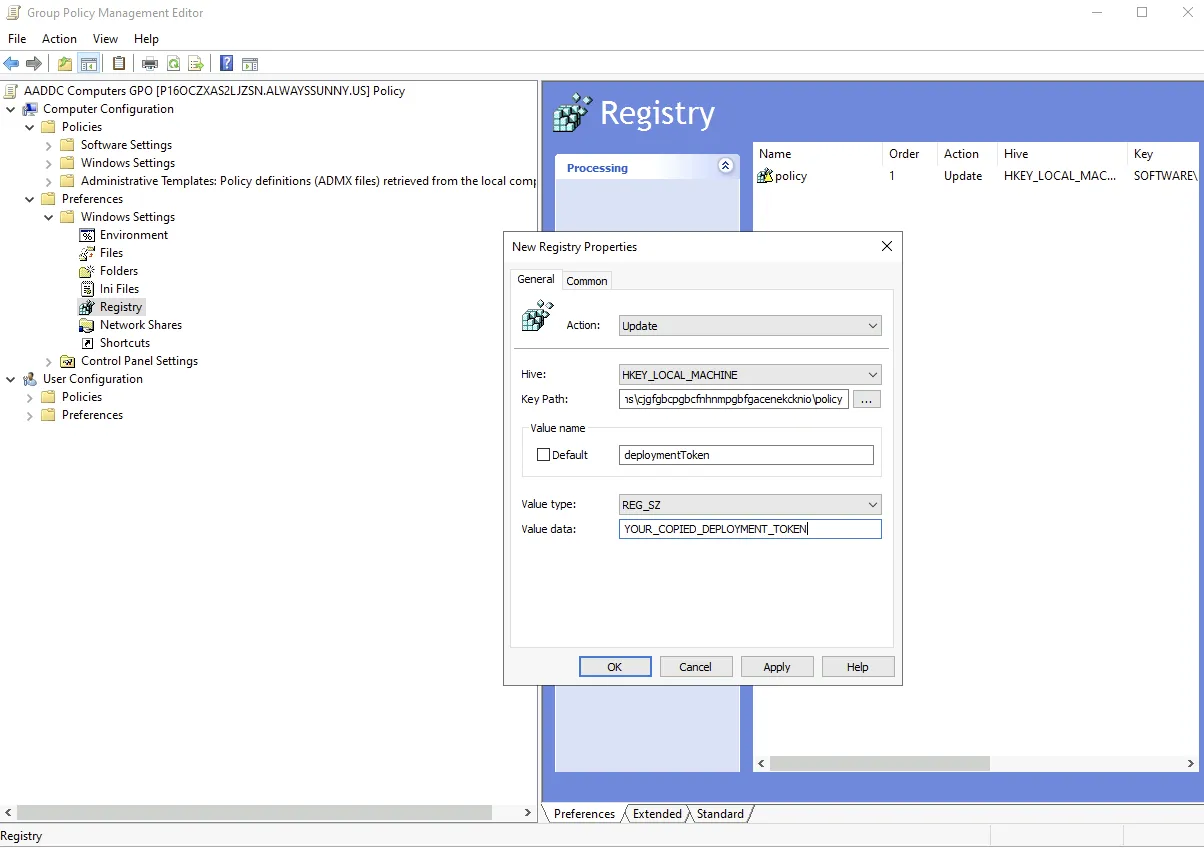
- Click “OK”
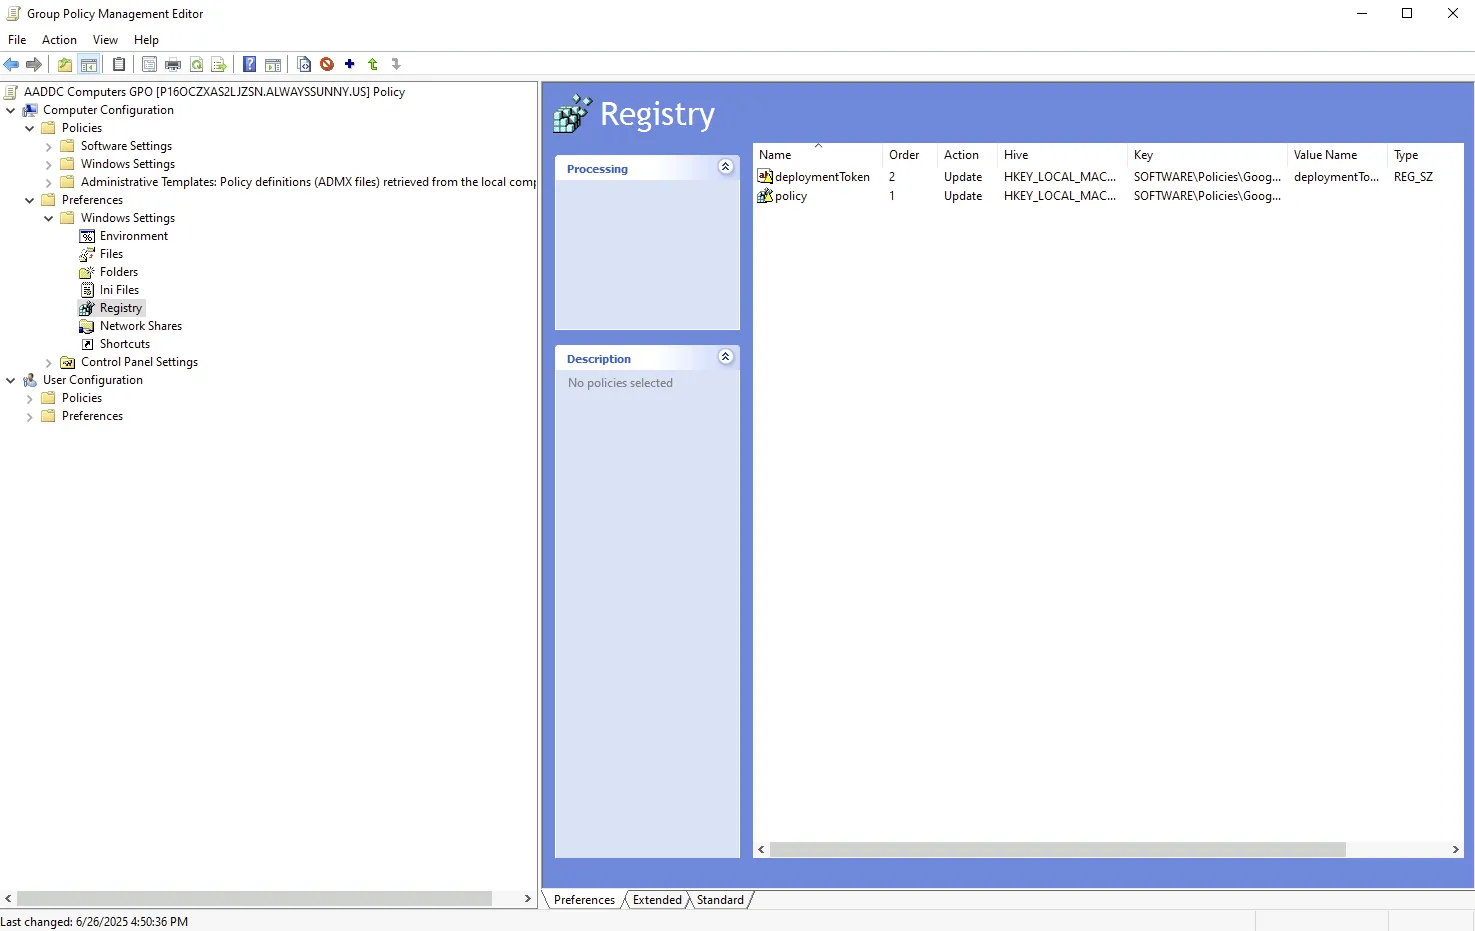
- Add Neon to the force install list
- To verify check that your settings match the example below
Edge
- Ensure you have Microsoft Entra Domain Services or permissions to manage AD through Group Policy
- Install the Group Policy Edge Admin template
- Download the policy extensions by From Microsoft and clicking “Download Windows 64-bit Policy”
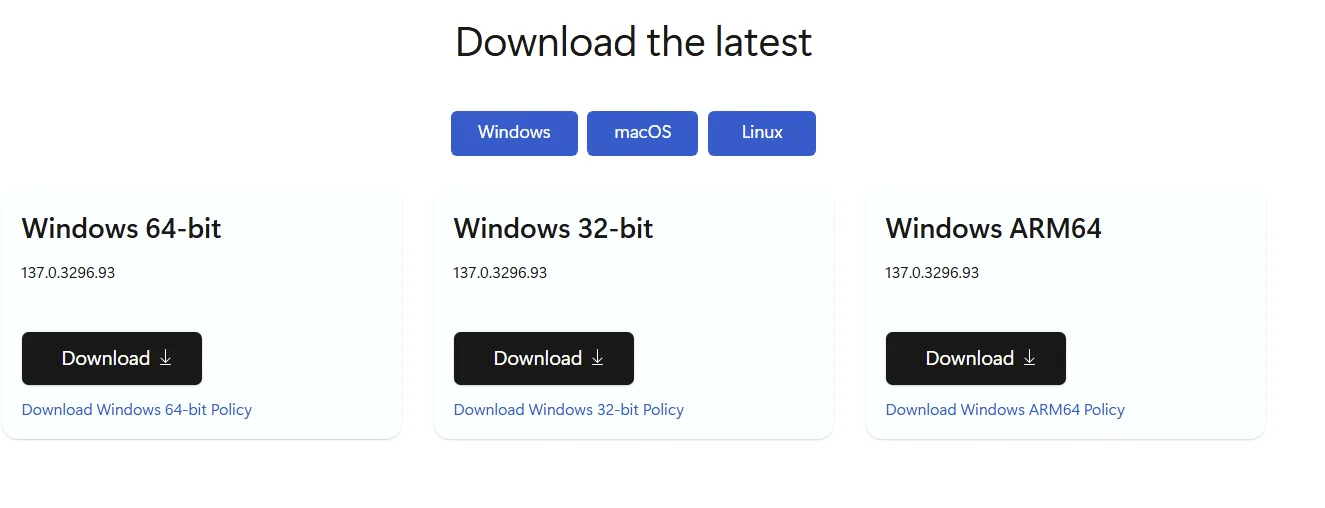
- Extract the downloaded cab (its a zip) file and “MicrosoftEdgePolicyTemplates” zip file
- Open Group Policy Management Editor
- Under the correct Domain select Computer “Configuration” -> “Administrative Templates”
- Right click Administrative Templates and select “Add/Remove Templates”
- Click “Add”
- Navigate to your extracted bundle under “unzipped directory/windows/adm/language/msedge.adm”
- Verify the template was added in GPM under “Templates/Classic Administrative Templates/Microsoft Edge”
- View your Neon Cyber Configuration
- In the Neon Platform click “Deployments” -> “Add Users” -> “Microsoft Environments”
- Click “Group Policy”
- Select “Edge” and “Windows”
- Find your “Deployment Token”
- Update Group Policy Configuration
- In Group Policy Management select “Computer Configuration” -> Templates -> “Microsoft Edge” -> “Extensions”
- If you would like to install for select users do the same under User “Configuration”
- Select “Control which extensions are installed silently”
- Clicked the “Enabled” radio button and click “Show”
- Paste in “ojablpjhhnghnemkmpaghanndgoenjpd;https://clients2.google.com/service/update2/crx”
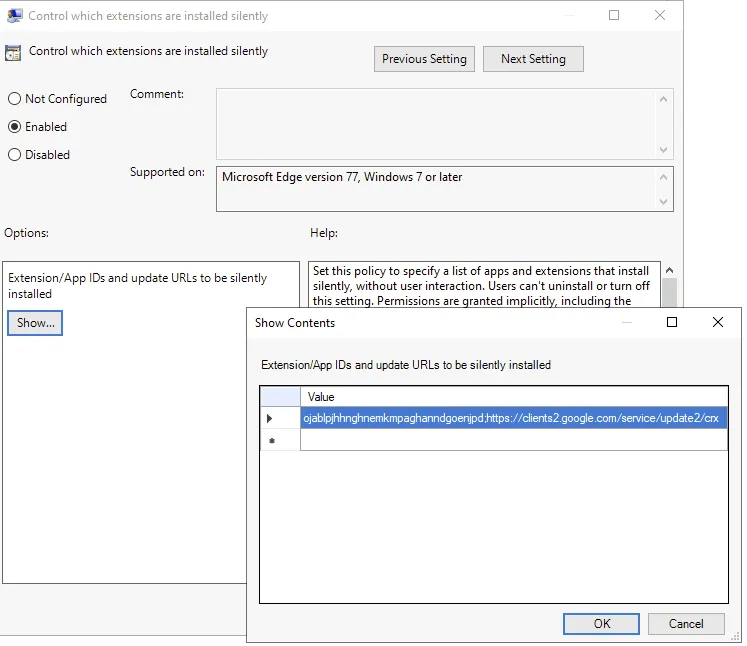
- Click “OK” on the current and previous screens
- Under “Computer Configuration” -> “Preferences” -> “Windows Settings” select “Registry”
- Add Neon to the force install list
- Right click in the “Registry” panel and select “New” -> “Registry Item”
- Add “SOFTWARE\Policies\Microsoft\Edge\3rdparty\Extensions\ojablpjhhnghnemkmpaghanndgoenjpd\policy” to “Key Path”
- Click “OK”
- Add Neon configuration to extension policy
- Right click in the “Registry” panel and select “New” -> “Registry Item”
- Add “SOFTWARE\Policies\Microsoft\Edge\3rdparty\Extensions\ojablpjhhnghnemkmpaghanndgoenjpd\policy” to “Key Path”
- Add “deploymentToken” to “Value name”
- Copy/paste the deployment token from Neon Cyber platform to “Value Data”
- Click “OK”
- Add Neon to the force install list
- To verify check that your settings match the example below
Microsoft Intune Admin Center Steps
Edge
Create Intune Device Policy
- Navigate to Microsoft Intune admin center
- On the left click “Devices” -> “Configuration”
- Under Policies click “Create” -> “New Policy”
- Select “Windows 10 and later” under “Platform”
- Select “Settings catalog” under “Profile Type”
- Click “Create”
- On the “Create profile” Screen
- Basics
- Add a descriptive name such as “Neon Cyber Extension”
- Optional Add a description
- Click “Next”
- Configuration settings
- Click “Add settings”
- Search for “Edge”
- Select “Microsoft Edge\Extensions”
- Select “Control which extensions are installed silently”
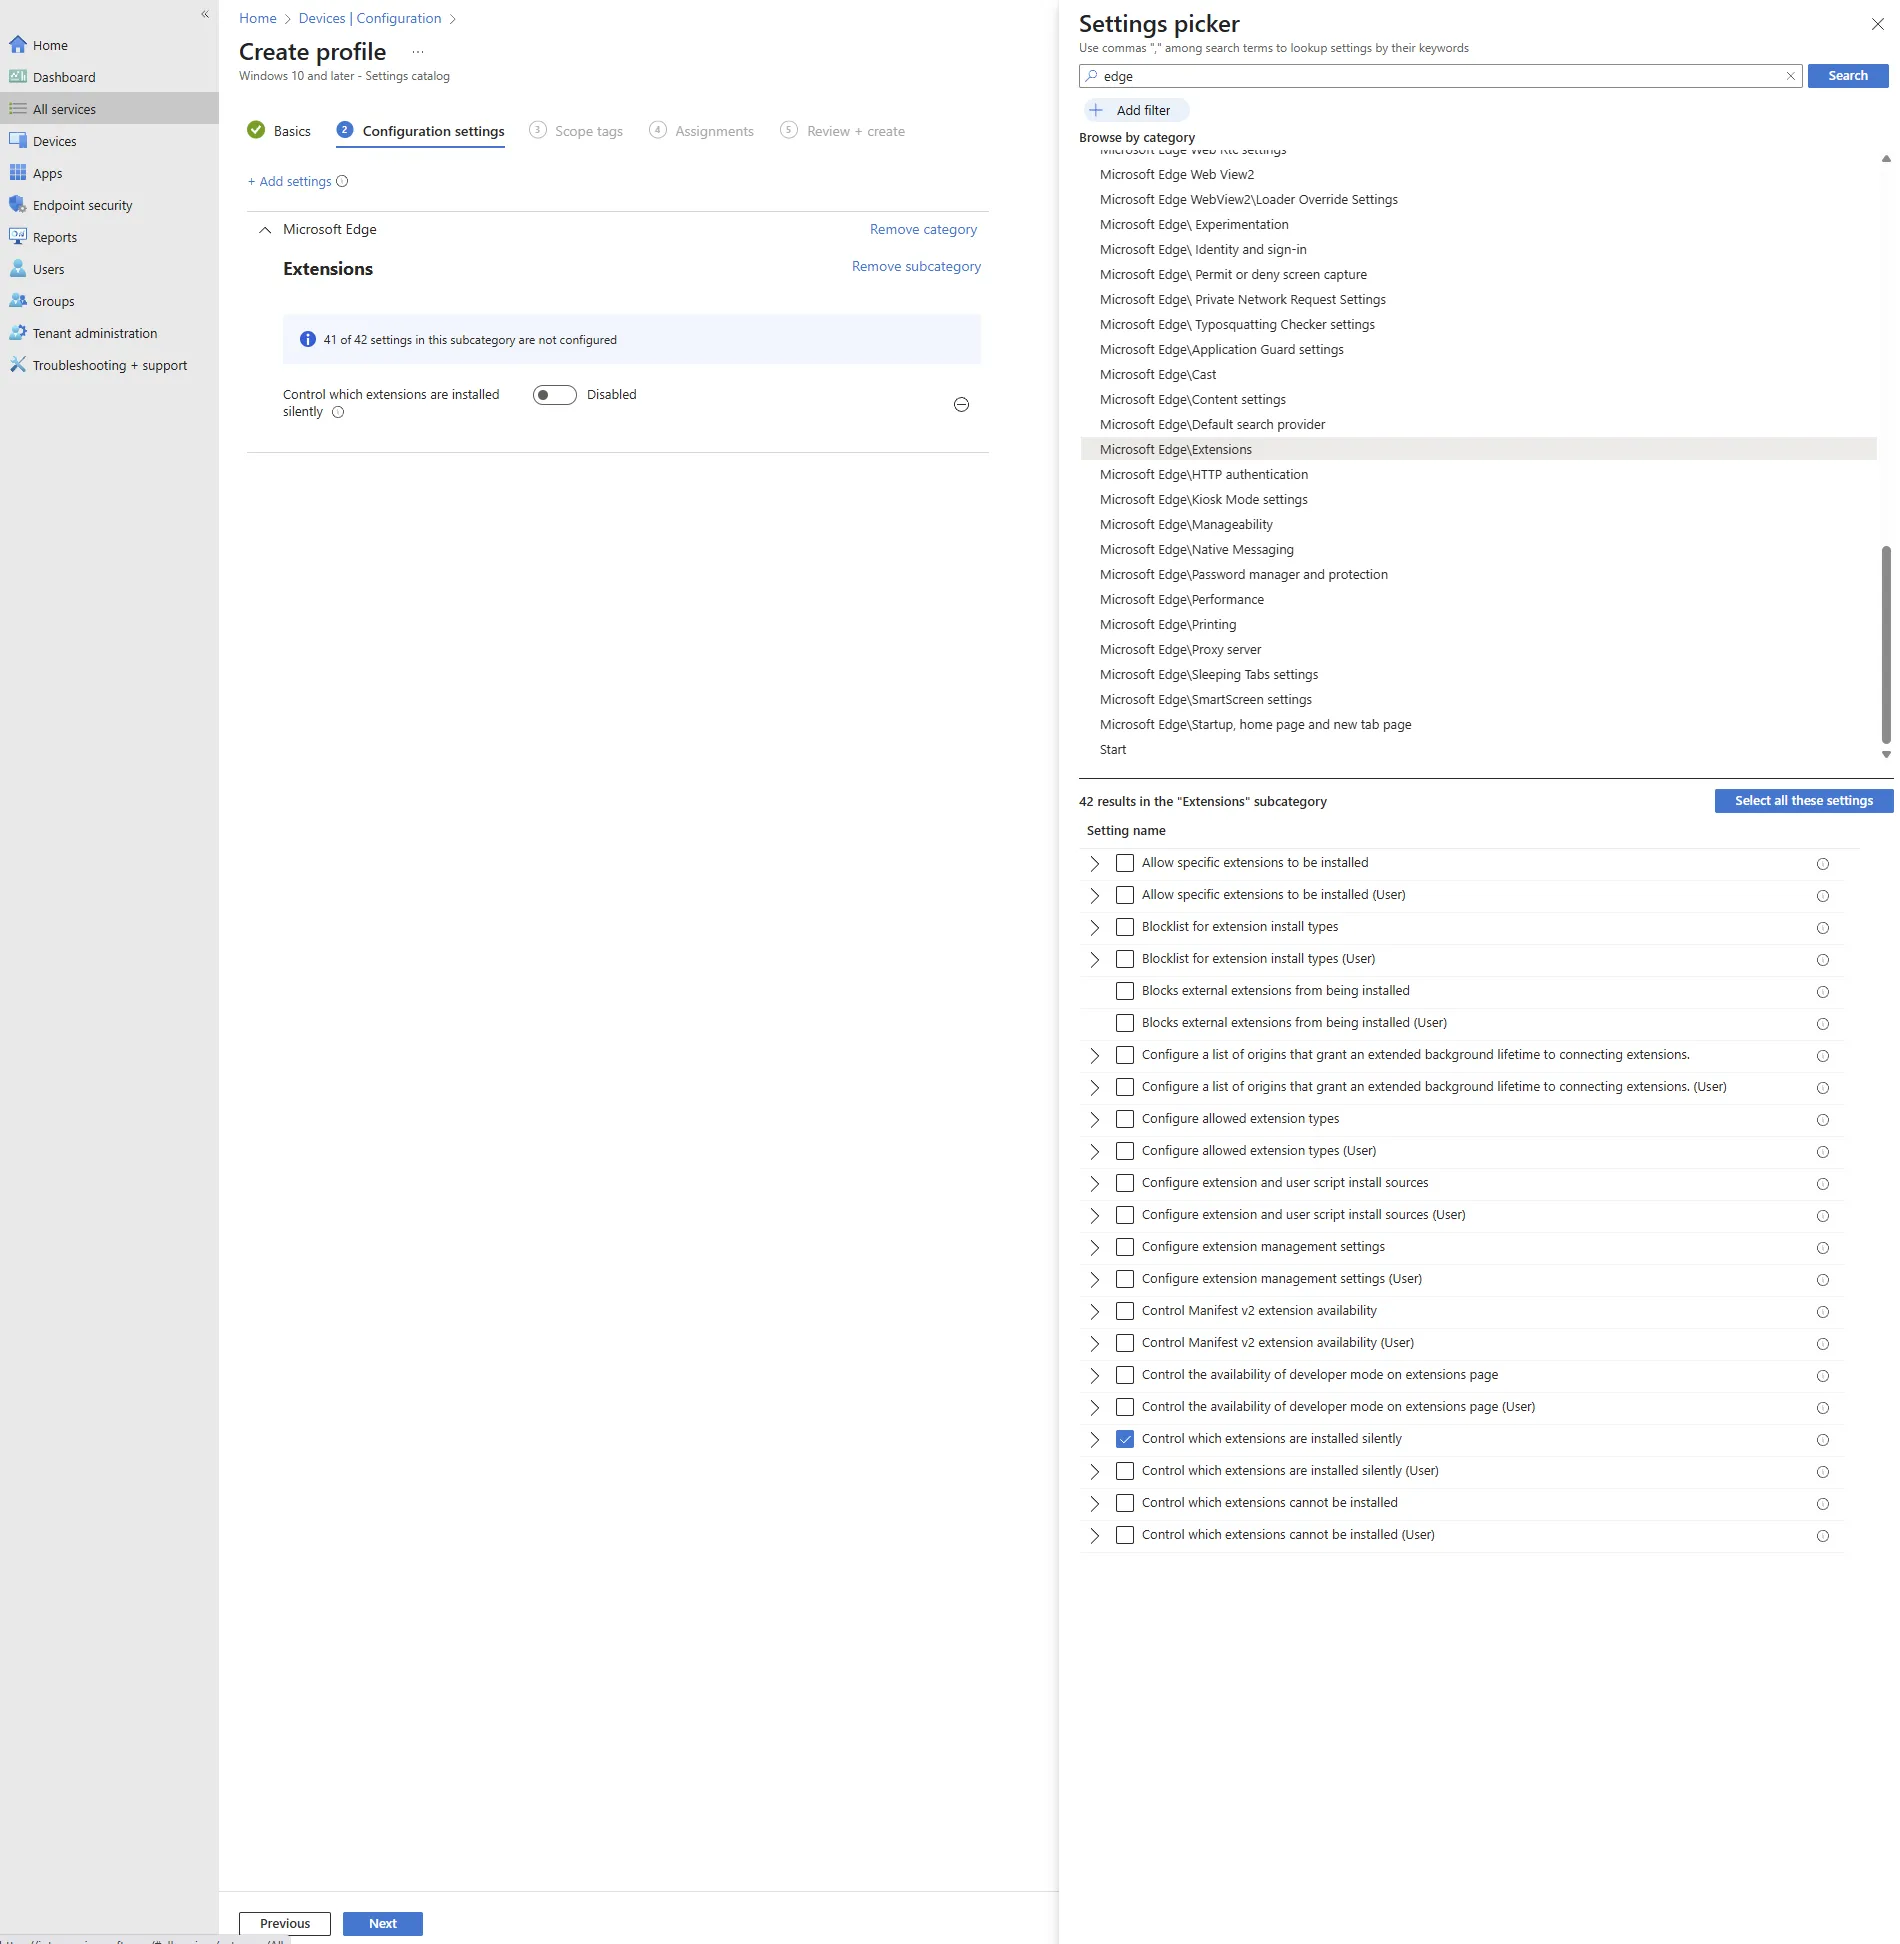
- On the left side switch the setting to “Enabled”
- In the box above enter “ojablpjhhnghnemkmpaghanndgoenjpd;https://clients2.google.com/service/update2/crx”
- Check the box next to the extension id
- Click “Next”
- Assignments
- Click “Select Group”
- Select the Entra group you would like to push the extension too
- Click “Select”
- Ensure the group is selected before clicking “Next”
- Scope tags
- Set any scopes you require
- Click “Next”
- Review + create
- Review the settings and policy
- Click “Create”
- Basics
Create Intune Powershell
- Navigate to Microsoft Intune admin center
- On the left click “Devices” -> “Scripts and remediation”
- Click on the “Platform Scripts” tab
- Click “Add” -> “Windows 10 and later” to create a new powershell script
- Basics
- Add a descriptive name such as “Neon Cyber Extension Config”
- (Optional) Add a scription
- Click “Next”
- Script Settings
- Navigate to the downloaded file “neon-edge-windows-intune.ps1”
- Set “Run this script using the logged in credentials” to “No”
- Set “Enforce script signature check” to “No”
- Set “Run script in 64 bit PowerShell Host” to “Yes”
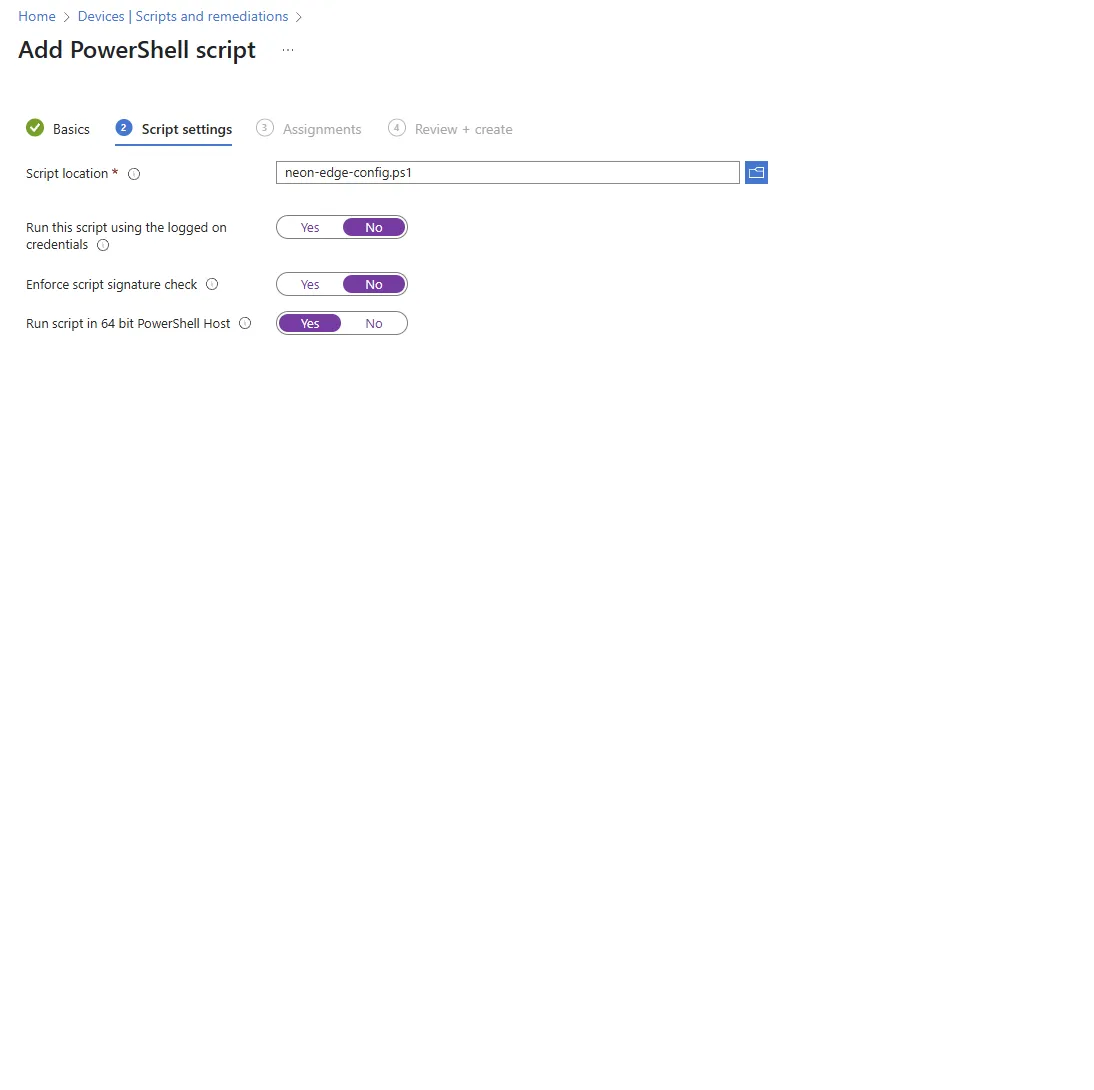
- Click “Next”
- Assignments
- Click “Select Group”
- Select the Device group you would like to push the extension to
- Click “Select”
- Ensure the group is selected before clicking “Next”
- Review + create
- Review the information matches the instructions
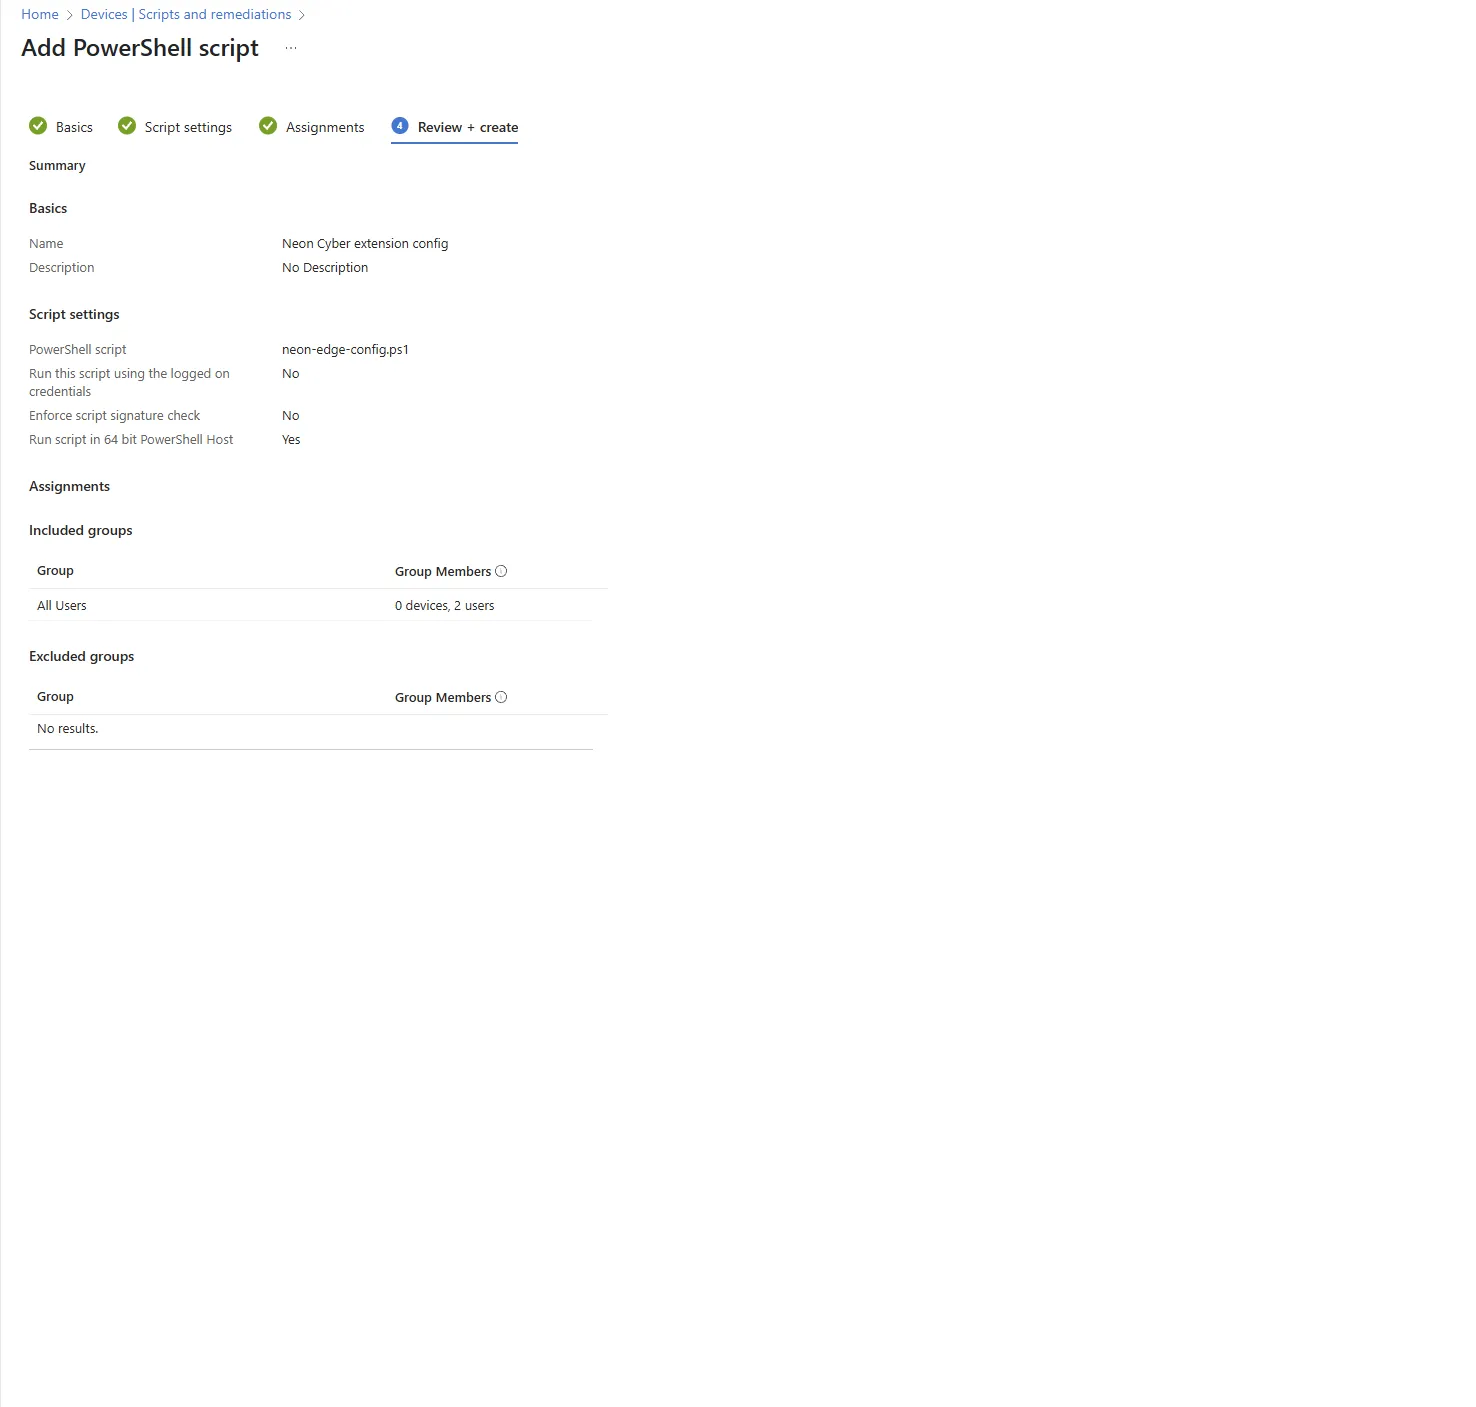
- Click “Create”
- Basics
Chrome
Create Intune Device Policy
- Navigate to Microsoft Intune admin center
- On the left click “Devices” -> “Configuration”
- Under Policies click “Create” -> “New Policy”
- Select “Windows 10 and later” under “Platform”
- Select “Settings catalog” under “Profile Type”
- Click “Create”
- On the “Create profile” Screen
- Basics
- Add a descriptive name such as “Neon Cyber Extension”
- Optional Add a description
- Click “Next”
- Configuration settings
- Click “Add settings”
- Search for “Chrome”
- Select “Google Chrome\Extensions”
- Select “Configure the list of force-installed apps and extensions”
- On the left side switch the setting to “Enabled”
- In the box above enter “ojablpjhhnghnemkmpaghanndgoenjpd;https://clients2.google.com/service/update2/crx”
- Check the box next to the extension id
- Click “Next”
- Assignments
- Click “Select Group”
- Select the Entra group you would like to push the extension too
- Click “Select”
- Ensure the group is selected before clicking “Next”
- Scope tags
- Set any scopes you require
- Click “Next”
- Review + create
- Review the settings and policy
- Click “Create”
- Basics
Create Intune Powershell
- Navigate to Microsoft Intune admin center
- On the left click “Devices” -> “Scripts and remediation”
- Click on the “Platform Scripts” tab
- Click “Add” -> “Windows 10 and later” to create a new powershell script
- Basics
- Add a descriptive name such as “Neon Cyber Extension Config”
- (Optional) Add a scription
- Click “Next”
- Script Settings
- Navigate to the downloaded file “neon-chrome-windows-intune.ps1”
- Set “Run this script using the logged in credentials” to “No”
- Set “Enforce script signature check” to “No”
- Set “Run script in 64 bit PowerShell Host” to “Yes”
- Click “Next”
- Assignments
- Click “Select Group”
- Select the Device group you would like to push the extension to
- Click “Select”
- Ensure the group is selected before clicking “Next”
- Review + create
- Review the information matches the instructions
- Click “Create”
- Basics
Google Admin Managed Chrome
Adding the Neon Cyber extension to Chrome
If you are using the Google Admin console to manage your browsers (through Workspace, Enterprise Browser, Browser Cloud Management), you can enroll Neon Cyber in a few short steps.
If you are not currently enrolled, speak with your IT team to discuss how best to proceed with enabling managed Chrome browsers.
To install and configure Neon Cyber across your managed Chrome browsers, first, download your Neon Cyber policy configuration from our platform.
- From inside the Neon Cyber console, go to deployments and click “add user” 2. Select and continue on Google Workspace 3. Download your policy config file
Next, log into Google Admin and navigate to the Users & Browsers page.
- Select which Organizational Units to target a starting group, or use the “Include All Organizational Units” to deploy across your enterprise.
- Click the “Add the Chrome app or extension by ID button”
- Enter the Neon Cyber Extension ID: ojablpjhhnghnemkmpaghanndgoenjpd and click save.
- Under “Policy for extensions” in the bottom right hand corner, click the upload button.
- Add your Neon-google-workspace-policy.json file and then click save.
- In the installation policy for Neon Cyber, set the policy to Force install and then click save.
At this point, the Neon Cyber agent will deploy to users in the units that you had selected.
References
Managing Edge browsers with Microsoft 365
Manage Edge extensions
Manage Edge policies with Intune
Deploying powershell scripts through Intune
Configuring extension settings policy